![InnoVintSupportCenter - header.png]](https://support.innovint.us/hs-fs/hubfs/InnoVintSupportCenter%20-%20header.png?width=300&height=22&name=InnoVintSupportCenter%20-%20header.png)
Generate a printable (or savable-as-PDF) physical inventory count sheet from your Inventory Explorer data — perfect for counting your cellar, warehouse, or tasting room inventory by hand. This article covers:
What is the Reconciliation Worksheet
The Reconciliation Worksheet turns any Inventory Explorer export into a clean, printable count sheet you can carry around while you do a physical inventory count. Build it from your entire inventory across every location, or narrow it down to just the area you’re counting — for example, only your tasting room locations. The worksheet is accessible via this external link, working alongside SUPPLY.
You choose how the worksheet is formatted before you print or save it: you can show each line’s current system on-hand quantity as a reference, or hide it so staff count blind. You can also choose whether all of your selected locations print together on one continuous sheet, or whether each location starts on its own fresh page — handy when you’re splitting the count across multiple staff members.
How to use the Reconciliation Worksheet
Step 1: Create your inventory export
Start in the Inventory Explorer to build the export the worksheet will be based on.
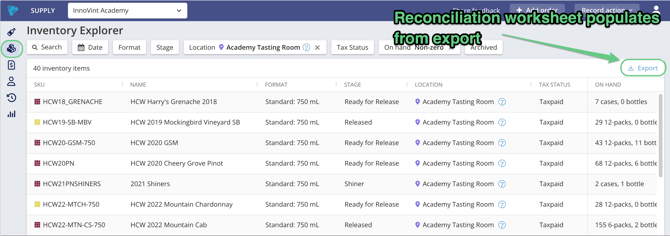
- Navigate to the Inventory Explorer.
- Filter the explorer to the inventory you want to reconcile. For example:
* Leave all filters open to include every SKU across every location, or
* Filter down to a specific area, such as your tasting room locations only - Click Export to download the filtered inventory data.
Step 2: Upload your export to the Reconciliation Worksheet
Once your export has downloaded, bring it into the Reconciliation Worksheet to generate the count sheet.
- Navigate to the Reconciliation Worksheet app.
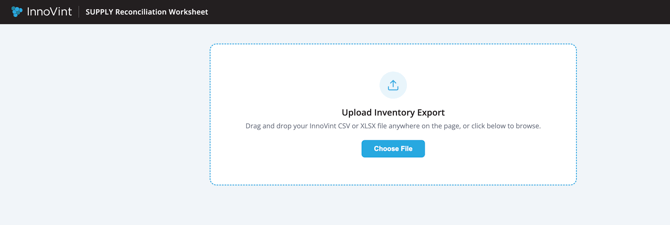
- Click Choose file.
- Select the export you just downloaded (it will be in your Downloads folder unless you saved it elsewhere).
- The worksheet populates automatically with the data from your export. Line items are sorted by location into the worksheet — for example, if you exported three tasting room locations, you’ll see SKUs at each location grouped together on the list.
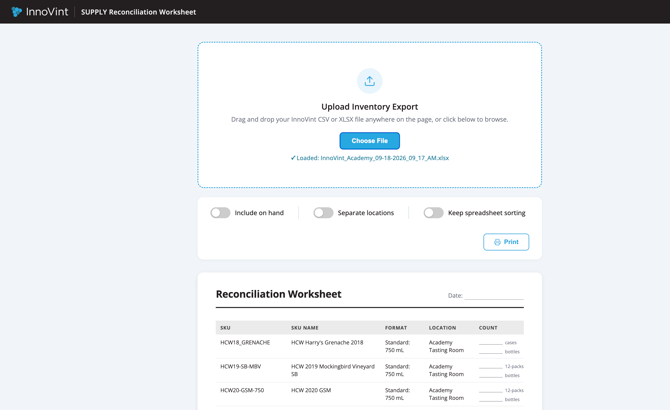
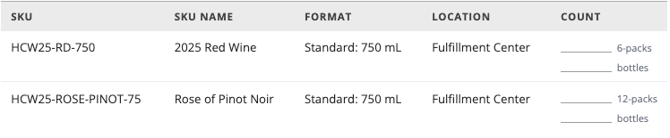
- Scroll down to review the full sheet before printing. Each line shows the SKU, its format, the location, and a blank Count field for writing in your physical count. The Counts field matches each SKU’s grouping/format — for example, “Cases and Bottles” for SKUs tracked that way, or just “Bottles” for SKUs tracked as a single unit.
Step 3: Choose Display options
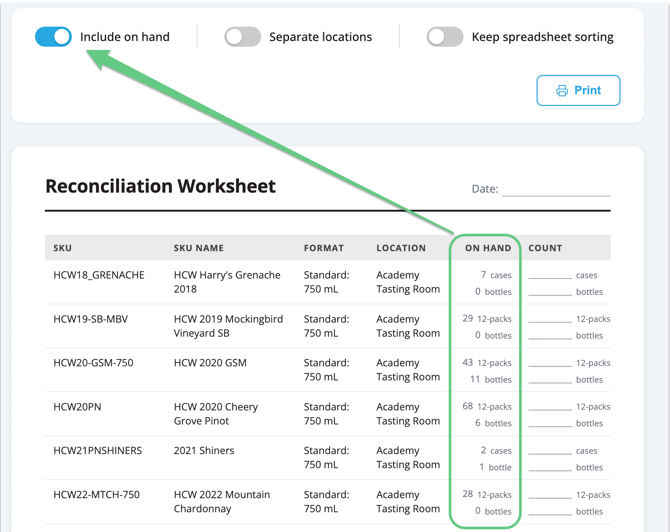
Include On Hand
By default, Include On Hand is turned off, so your worksheet is a blind count — staff write down what they count without seeing what the system currently expects.
Turn Include On Hand on if you’d rather see the current system on-hand quantity (pulled from your export) printed alongside each line, so counters can compare against it as they go.
Separate Locations
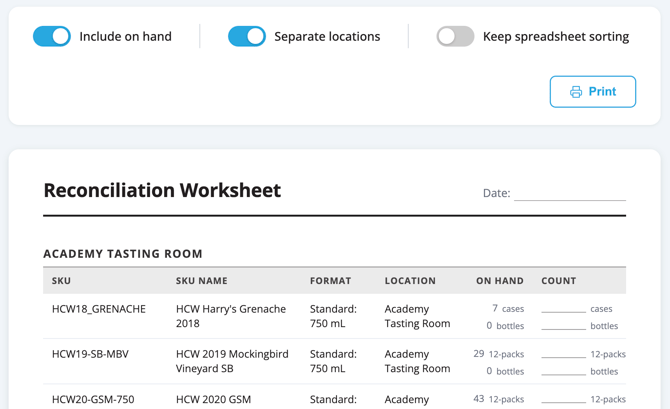
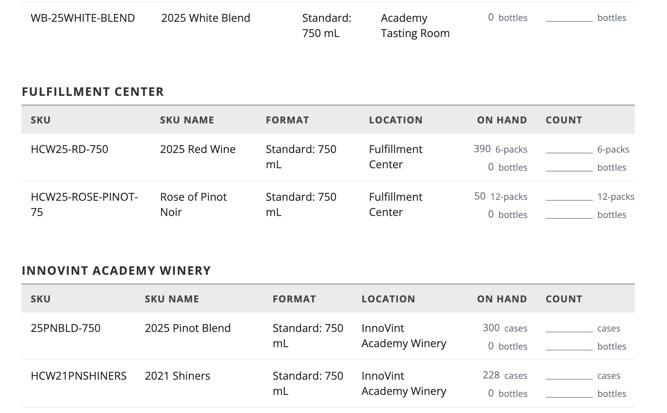
Turn on Separate Locations to give each location its own dedicated page(s) instead of listing every location one after another in a continuous list. This is useful when different staff members are each responsible for counting a different location, since you can hand each person just their section.
When it’s on, the printout finishes the current location and starts the next one on a fresh page.
Keep spreadsheet sorting
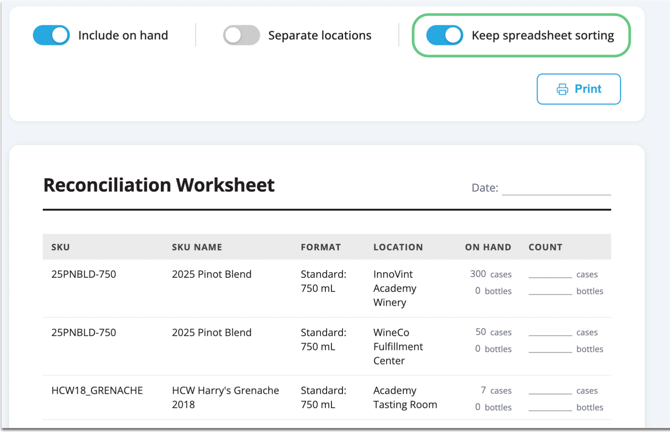
If you have already sorted your export file and want the reconciliation sheet to reflect this, choose Keep spreadsheet sorting. You might choose to do this to group all your SKUs together rather than group by location.
If you have also turned Separate locations on, the original sorting will be respected within each location's table.
Step 4: Printing or saving your worksheet
Once you’ve set your display options, click Print. This opens your browser’s print preview, where you can:
- Save as PDF to keep a digital copy, or
- Print directly to a physical printer.
Either way, you’ll get the same print preview first so you can confirm everything looks right before producing the final sheet(s).
Frequently Asked Questions
Q: Can I create a worksheet for just part of my inventory, like one tasting room?
A: Yes. Apply filters in the Inventory Explorer before exporting — for example, filter to only your tasting room locations — and only that filtered data will populate the worksheet.
Q: What’s the difference between having Include On Hand turned on versus off?
A: With it off (the default), your team counts blind, without seeing what the system expects on hand. With it on, the worksheet also prints the current on-hand quantity from your export next to each line, so counters can reference it while they count.
Q: Why would I use Separate Locations instead of leaving it off?
A: Turning it on starts a new sheet for each location instead of stacking every location on one continuous printout. It’s helpful when you’re splitting up the count and want to hand each staff member only the pages for their assigned location.
Q: Does SUPPLY save my Reconciliation Worksheet after I generate it?
A: No, you'll need to save a pdf on your computer if you'd like to retain a copy.